There's no one way I make things. Sometimes I hand build with coils or slabs but a lot of my work is slip cast.
The process depends on what I'm trying to make. Starting with an idea I usually begin by looking at forms that appeal to me, traditional objects we use every day or something old that I think could work better if it were made more in line with how we live now.
I might sketch it out, make a collage, just play around until I understand what I'm trying to do. Then I move into 3D software to design the actual form.
3D printing and prototyping
Once I'm happy with the design in the software I'll 3D print a prototype. This is really important. Seeing something at full scale, being able to hold it, put it next to another object gives me the sense of a thing that I just don't get from a screen. On a computer, everything is flat. You don't get the three dimensionality until you have it in your hands.
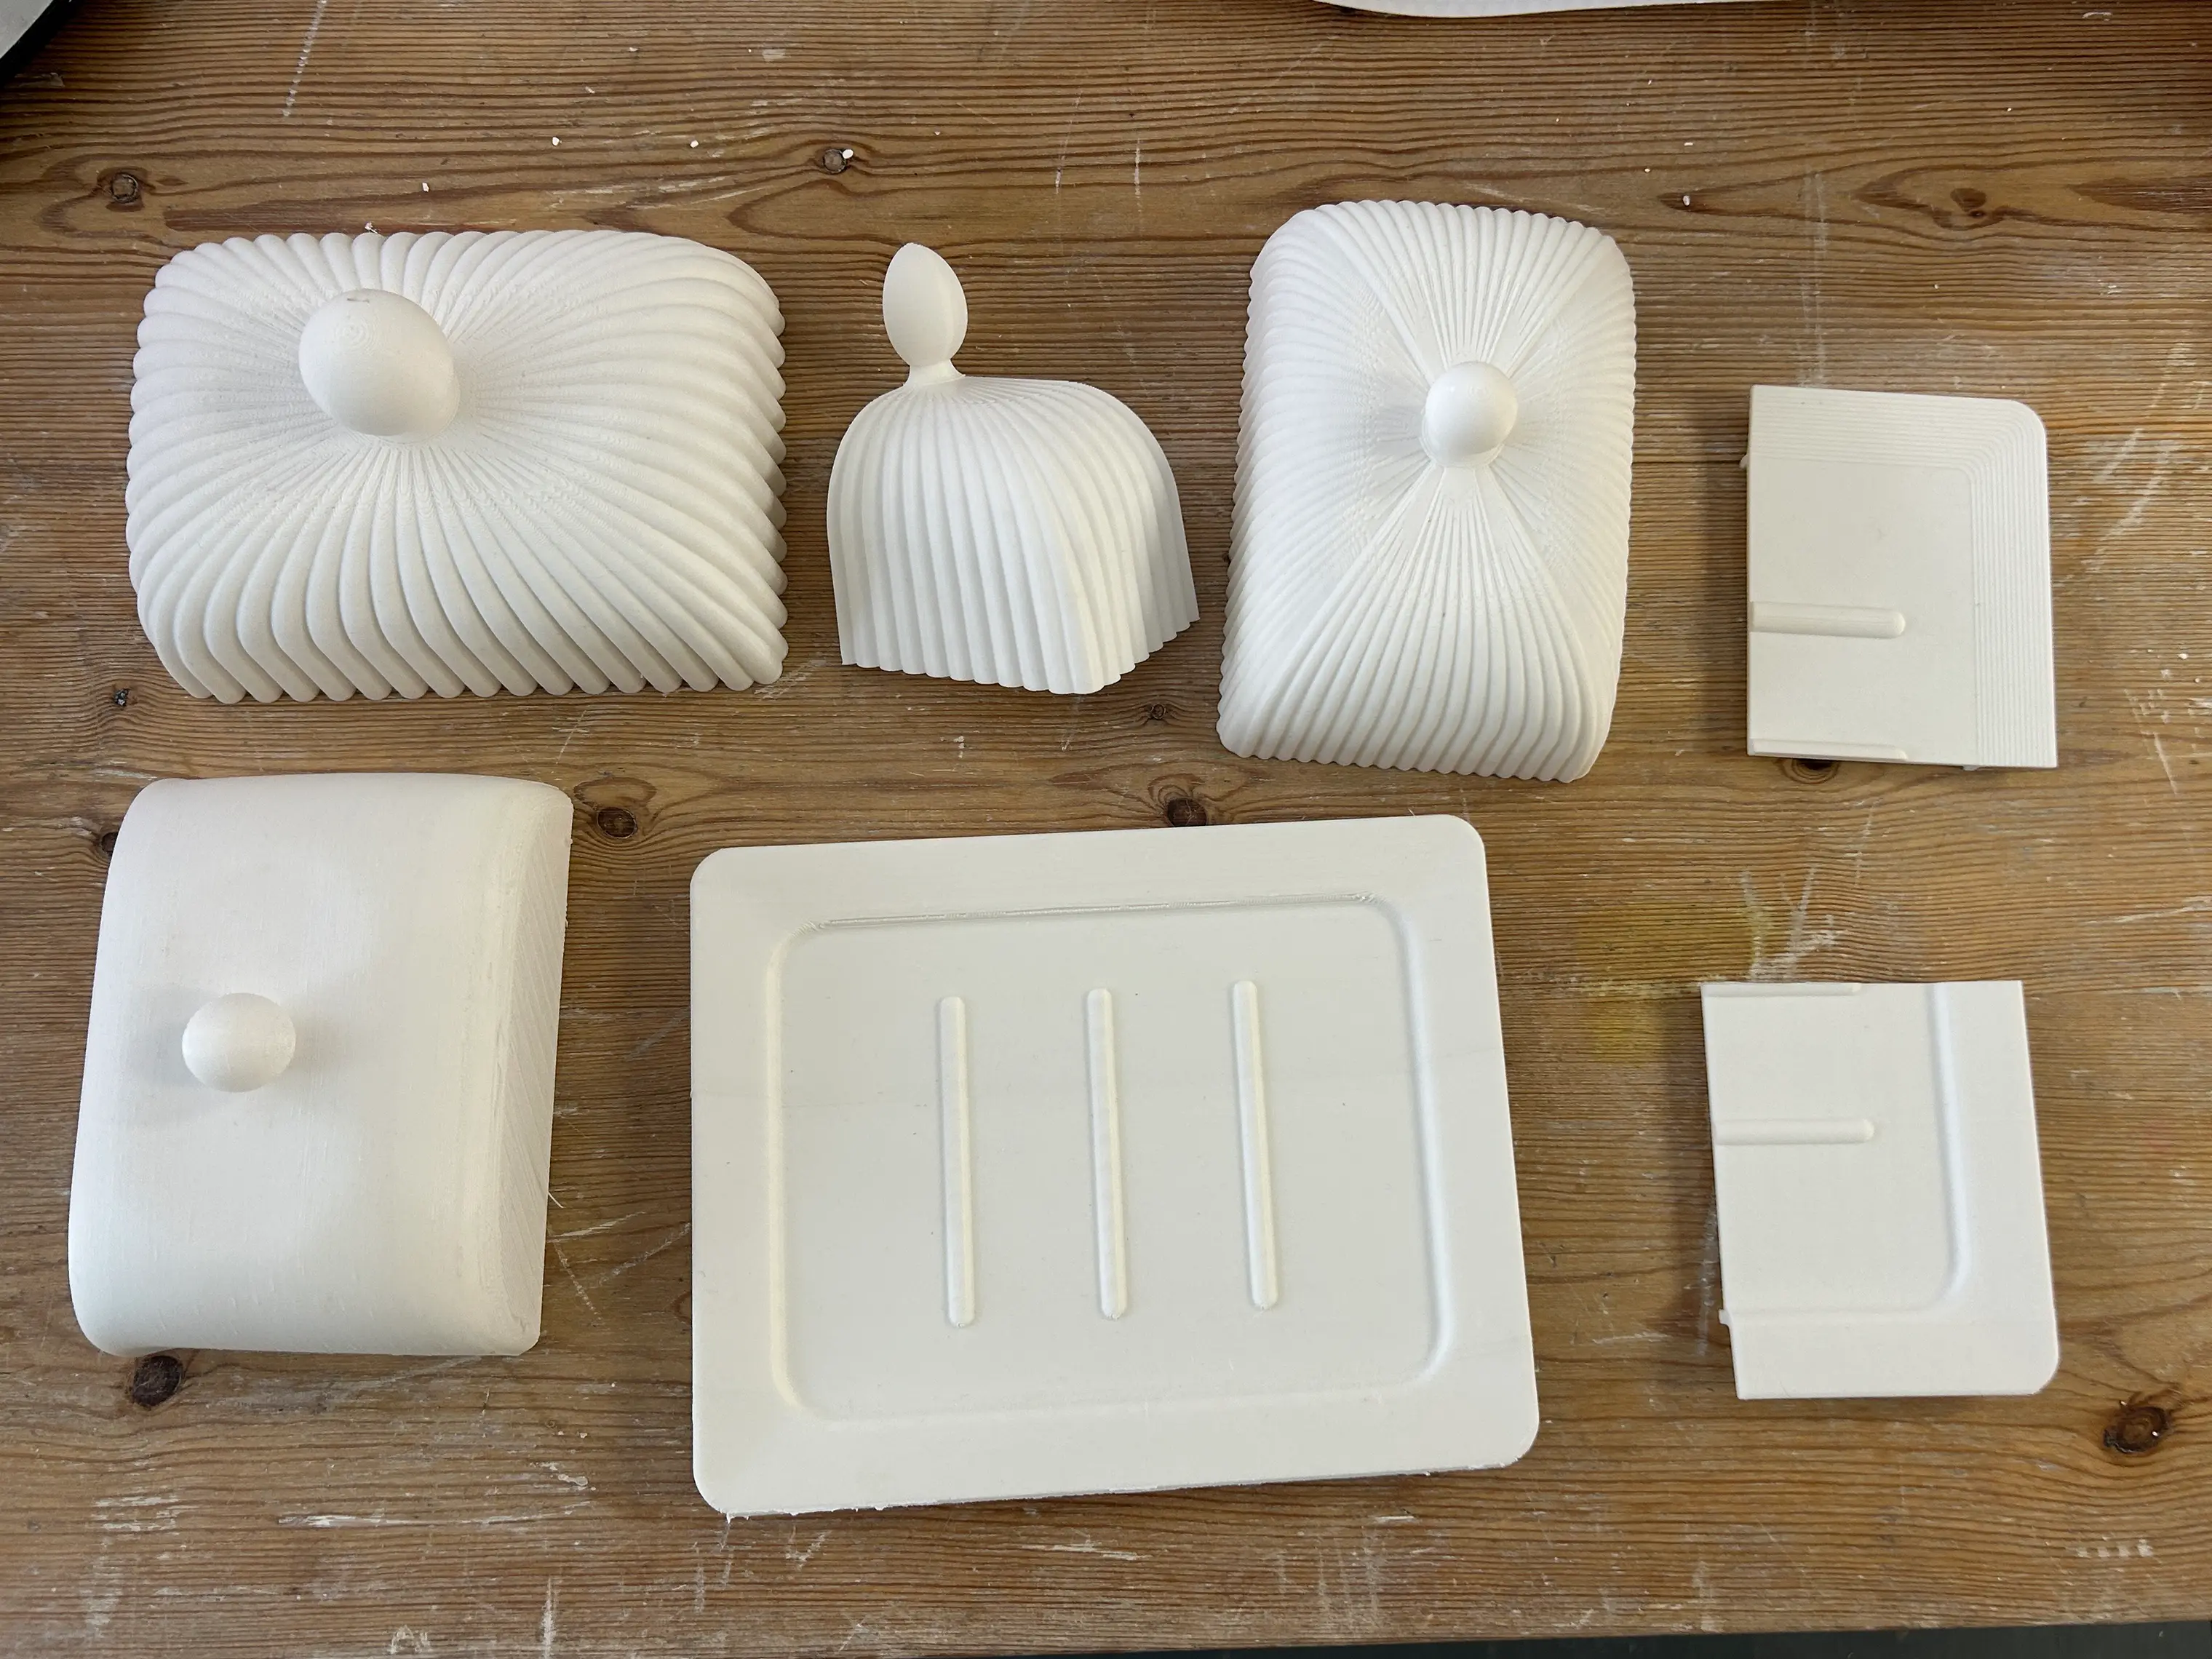
Making the moulds
If the prototype feels right I'll design a case mould in the 3D software and print that too. The case mould is what I pour plaster into to create the actual slip casting mould. Drying the plaster moulds takes a long time here in Cornwall because of the humidity. Sometimes it takes a week or more. If I'm in a hurry I'll take them to the university where they dry in two or three days instead.
Slip casting
Once the plaster moulds are dry I can start pouring the liquid slip. When the slip has firmed up to the right level I remove the cast from the mould. Then comes the fettling, trimming, smoothing the seams, refining edges, finishing it by hand. If I'm making fully enclosed forms like the spheres on my new collection I let everything dry for longer than you might think necessary. Any moisture trapped inside can cause explosions when it fires, so patience is important.
Firing
The first firing is the bisque fire, which happens at around a 1000°C. This makes the clay solid but porous and ready for glazing. I typically spray glaze because I can get even coverage and consistent results that way. Sometimes I paint glaze on if it's a small fiddly area or if I'm glazing a piece that's already vitrified. For those I use a glaze mixed with CMC gum which helps it adhere better.
The final firing depends on what I'm making. For most pieces I fire to around 1240°C with a fairly short soak to prevent warping. But for lampshades where I really want to emphasise the translucency of the porcelain I fire slightly lower to 1230°C and let it soak much longer.
Quality matters throughout
Accidents can happen at any stage. I might remove a cast from the mould too early and damage it. Or I've been known to accidentally jab my finger into a soft cast and dent it. If something goes wrong at this point and the piece is warped or dented I usually just recycle the clay because even if you reform a dent it often reappears when it fires anyway.
Sometimes after glazing I'll notice a small defect that can be fixed by refiring or adding a little more glaze to an area. If it's something that can't be fixed but the piece is still functional, it becomes a second and gets sold at a reduced price.
And that's it. From an idea to a finished piece ready to use.
Want to know more about what shapes my work and why I make the things I make? Read the interview here.
Curious about how I recycle my casting slip? I've written about that in more detail here.